Here are hints / correct screenshots for the Application Builder 201:
Question 6:
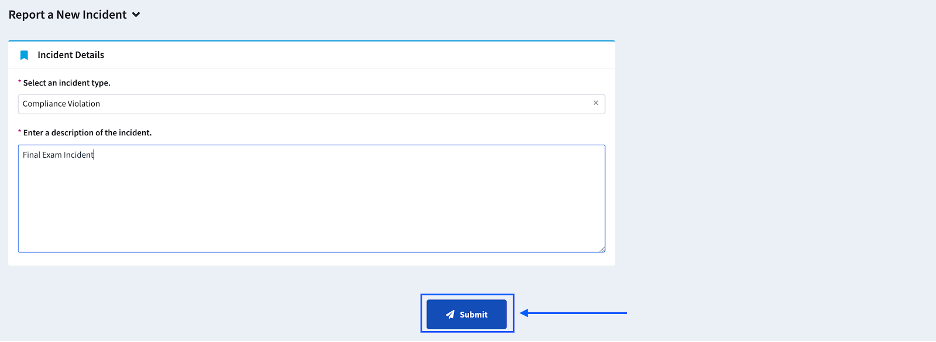
Now we'll test our Incident Management Application. To start, navigate to the Home Screen. In the Incident Management Application, click the + Create Record button. Select Report Incident, then click Create. In the Incident Record, select 'Compliance Violation' in the 'Select an incident type.' field and enter 'Final Exam Incident' as the description of the incident. Click the Submit button to proceed.
You'll be taken back to the Home Screen. Enter back into the Incident Record you just created by clicking the Linked Record Name and checking it out. (Note: Make sure you've given yourself access to all of the Roles we've created (Incident Creator, Incident Reviewer, Executive Management.) In this Step, scroll down to the 'Tasks' Subsection in the 'Resolution' Section and click the + Create New Task button. What happens?
What you should see:
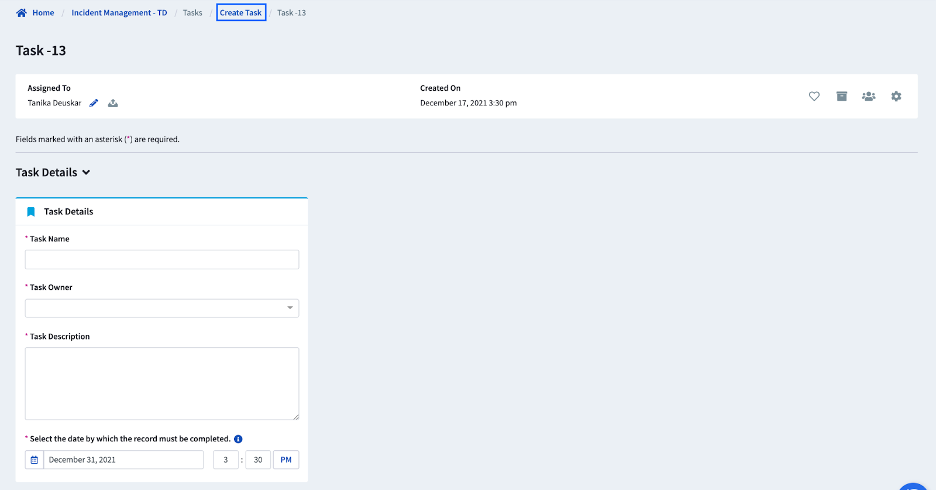
If you do not see this, go to the Step Builder of the ‘Review Incident’ Step (navigate to Build > Applications using the menu, search for the Incident Management Application using the search bar, double-click on it to access the Application Canvas, and click on the ‘Review Incident’ Step). In the ‘Tasks’ Linked Workflow Section, check whether you have configured the section such that (a) the Tasks Record is created in the ‘Create Task’ Step and (b) the Record is automatically created.
Question 7
On the 'Create Task' page, which of the following information is pre-populated? Select all that apply.
What you should see:
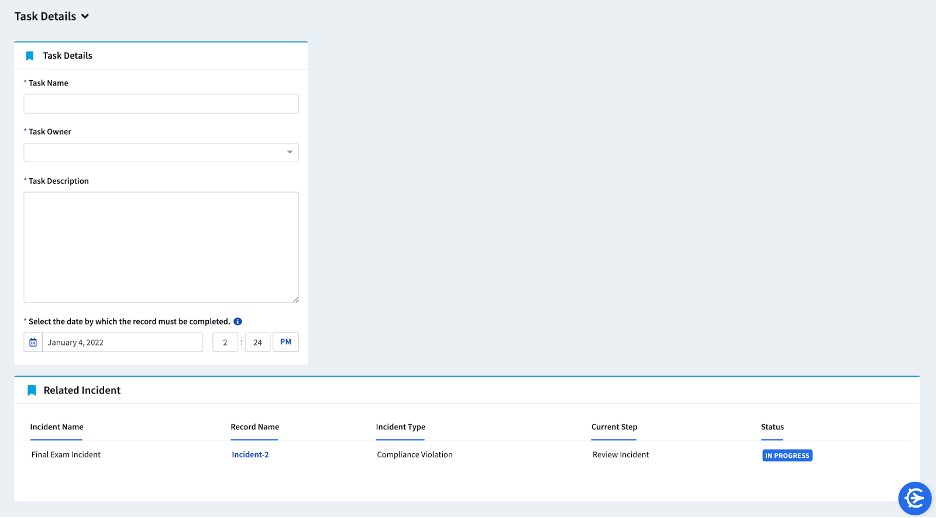
If this is not what you see:
- Navigate to the Incident Management Application Canvas and check whether a 14-day Service Level Agreement has been enabled on the “Tasks” Workflow. If the SLA has not been enabled, enable the SLA and try again. You may also want to look at the Service Level Agreements lesson if you are uncertain how to go about this (don’t worry, you won’t have to redo the lessons that follow if you go over the SLAs lesson again!!).
- Navigate to Step Builder of the ‘Create Task’ Step. Check whether you have configured a ‘Related Incident’ Linked Workflow Section. If you haven’t configured this section, you might want to look over the ‘Tasks Workflow Linked Workflows’ lesson.
Question 8
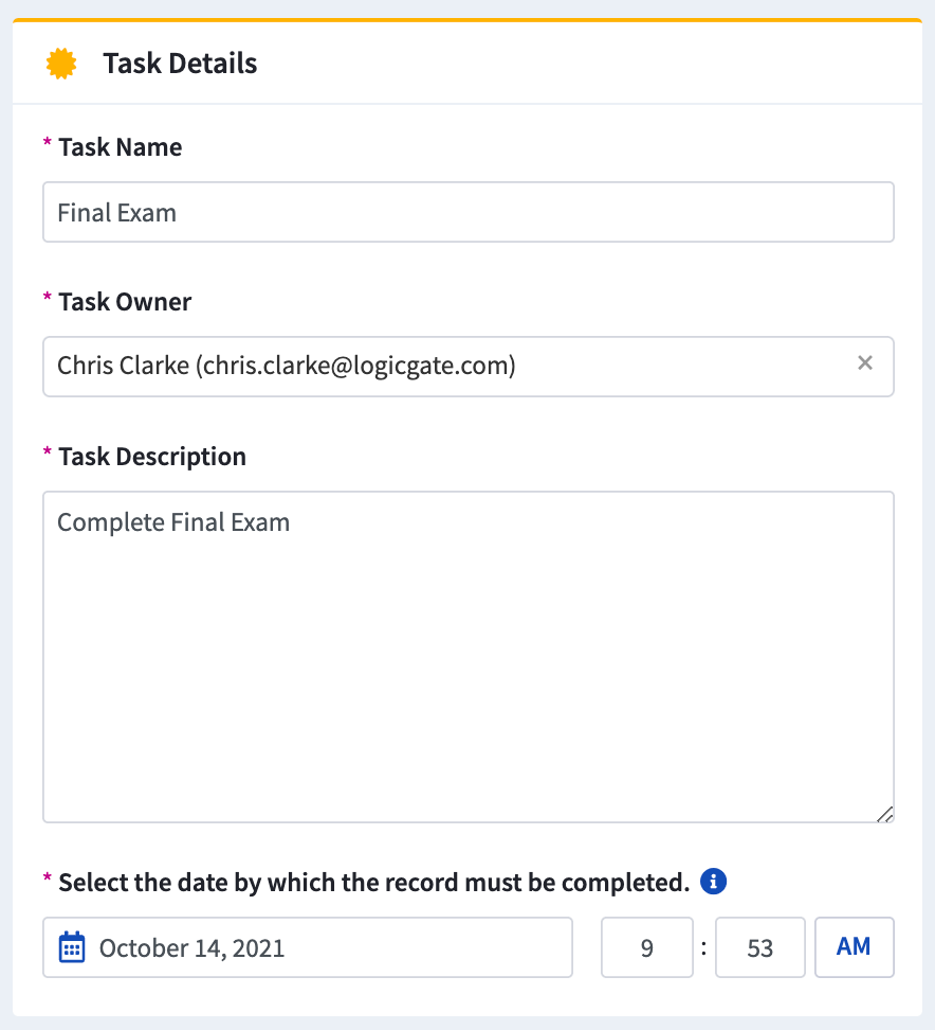
Enter the following information on the 'Create Task' page:
Task Name: Final Exam
Task Owner: Select yourself as the user.
Task Description: Complete Final Exam
Due Date: N/A - Leave as Is.
Click the Submit button and you'll be taken back to the 'Review Incident' Step. Click the 'Final Exam' link in the Linked Workflow to go back to the Task.

In the 'Work Task' Section, select 'Yes' from the 'Communication Required' Field.
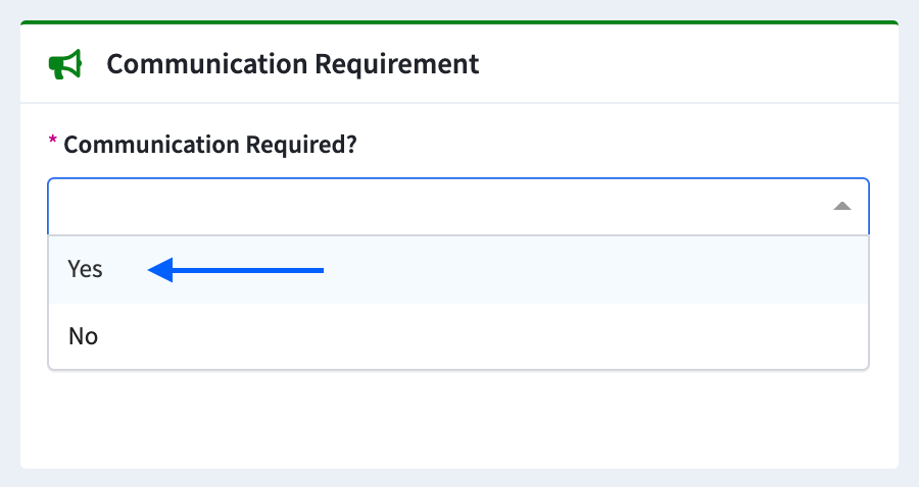
This will bring up the 'Add a Communication' Section. Click the + Create New Communication button to be taken to the 'Create Communication' Step. In the 'Incident Details' Section, which of the following pieces of information is not shown?
What you should see:
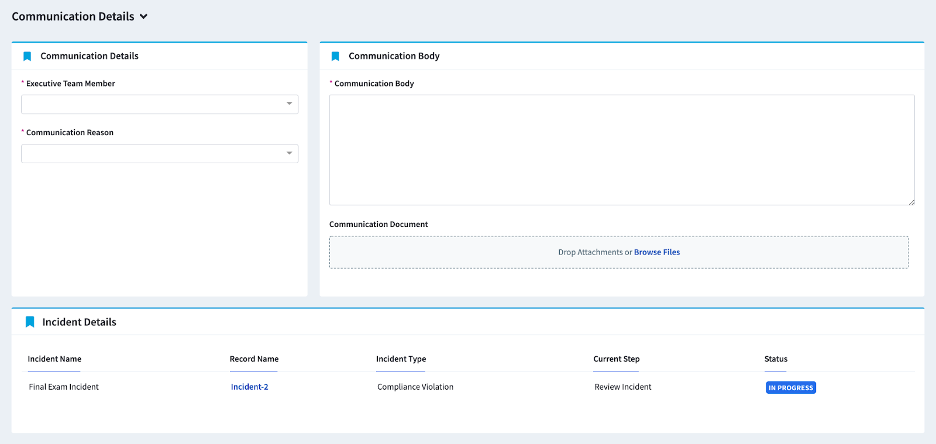
Question 10
Complete the rest of the Fields in the 'Create Communication' Step, making sure to select yourself in the 'Executive Team Member' Field. In the resulting notification email you receive, which Field is not displayed?
(Note: Review the 'Linked Workflows - Layouts, Jobs, & Roles' lesson for this configuration.)
What you should see:
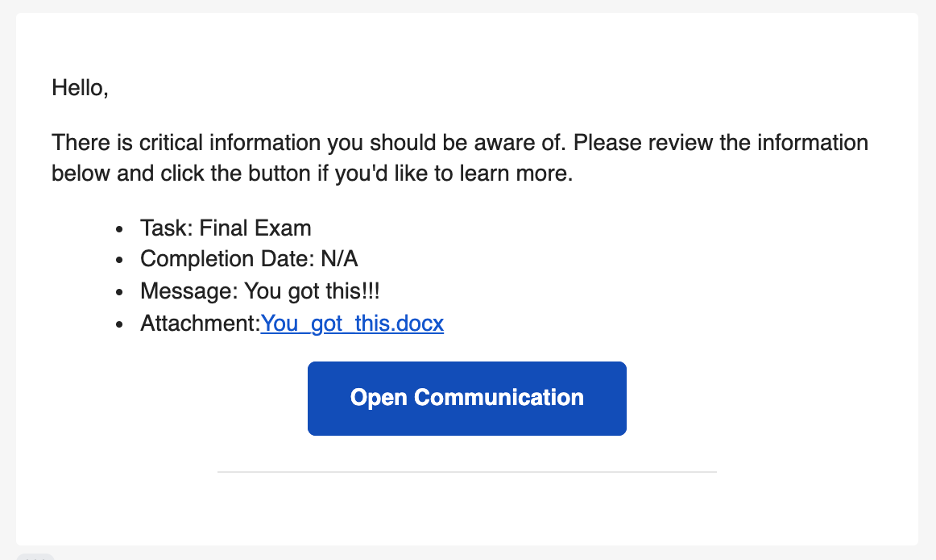
If you don’t see this, review the ‘Linked Workflows - Layouts, Jobs, & Roles' lesson. Navigate to Build > Jobs and click on the ‘Send Communication’ Job. Navigate to the Message Tab. Check if you have included the required Field Variables in the “Email Content” section.