How to create a new Application in Risk Cloud
Definition of an Application
An Application is defined as a collection of Workflows, Steps, and logic that collectively solve a business use case (e.g., ERM, Third Party Risk Management, Incident Management etc.).
When should you create a separate Application?
-
If business use cases are managed by different teams within your organization. For example, Audit Management and Incident Management are typically captured by separate Applications.
-
If you want to be able to manage the Home Screen for one use case separately from another use case.
-
Note that even though two Applications may be separate, you can still create Workflow relationships and link Workflows from one Application to another. For example, if you want to house all internal controls and control testing in one Application, you can link to the Workflow that houses those controls from your Risk Management Application.
Step-by-step guide to create a new Application
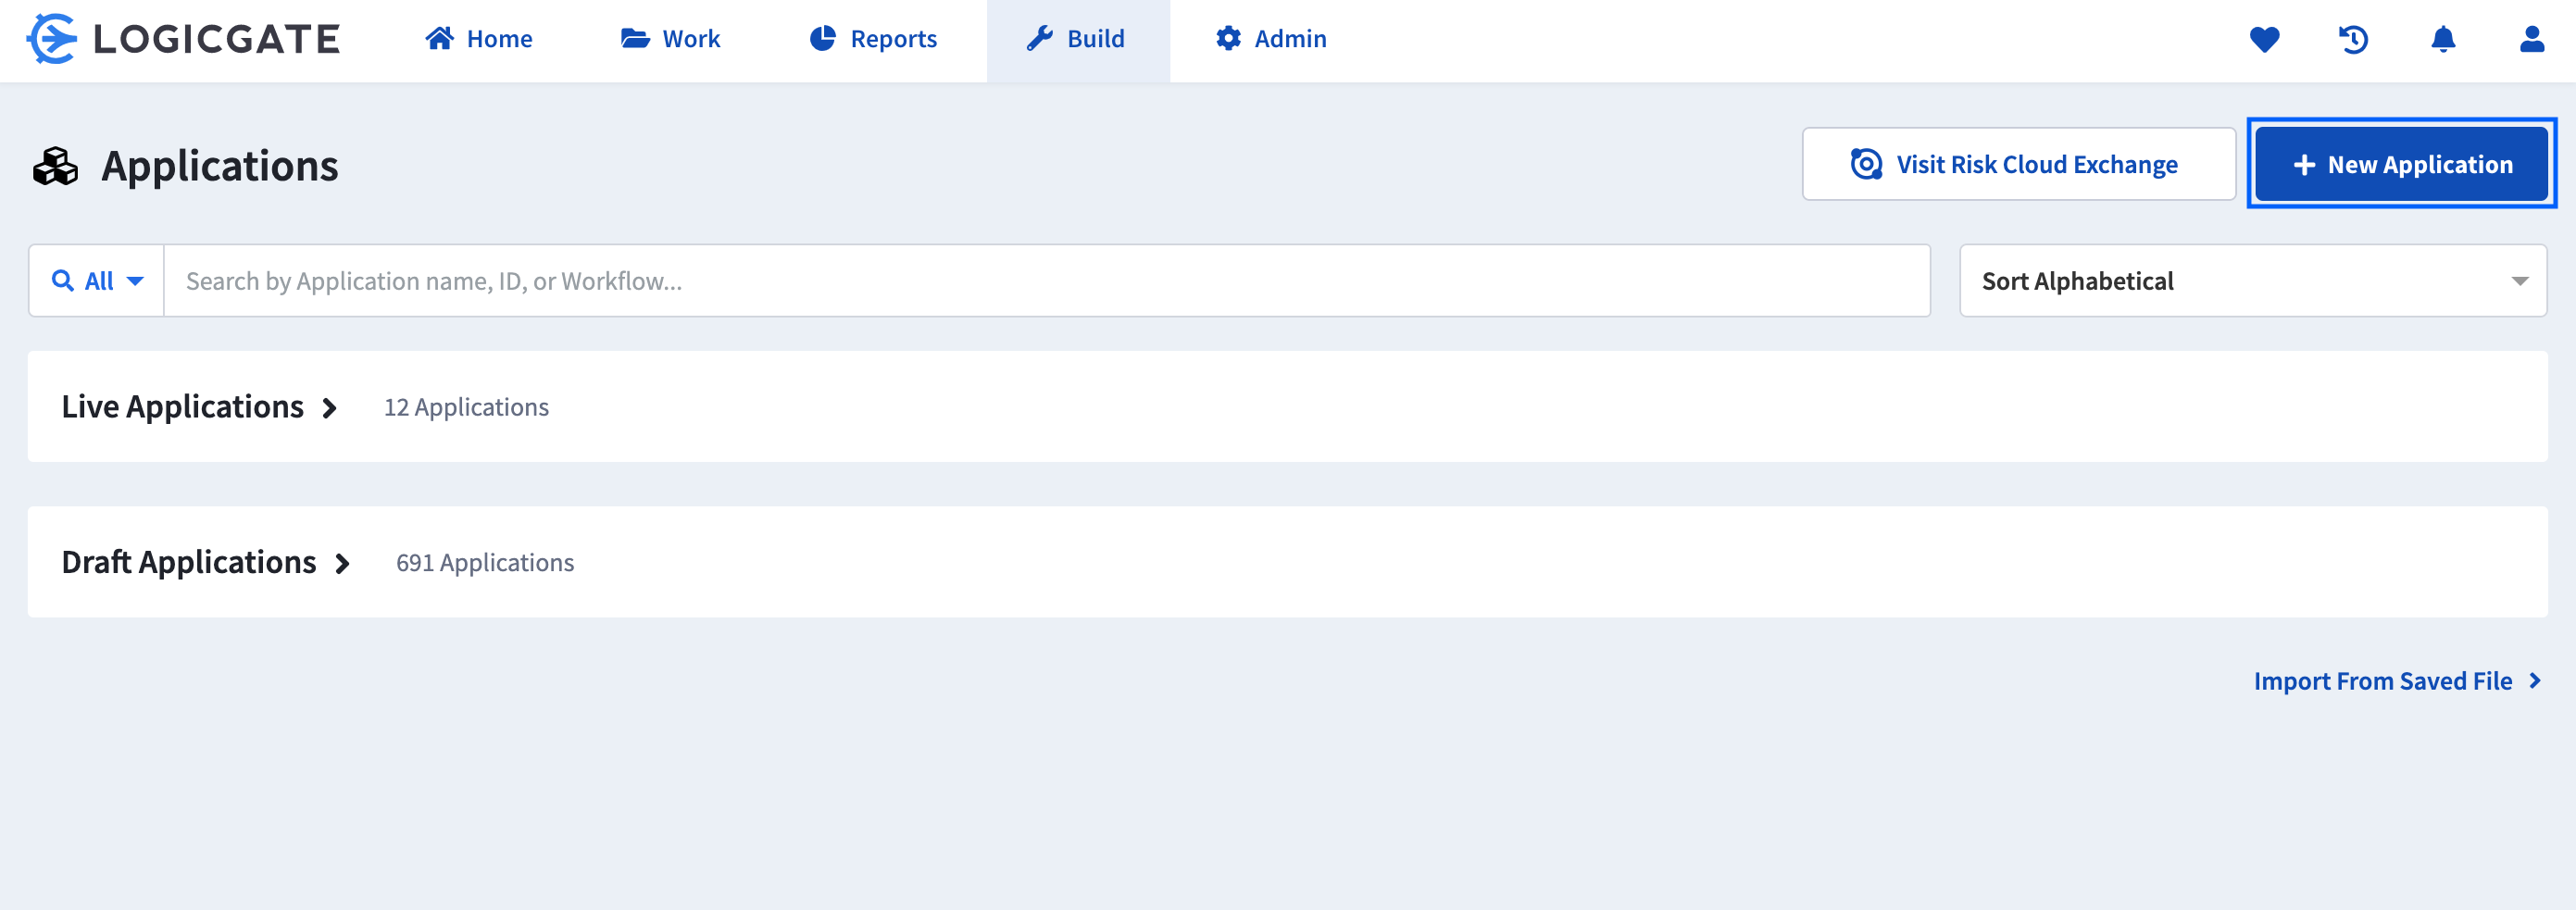
1. Navigate to Build > Application in Risk Cloud. Click + New Application.

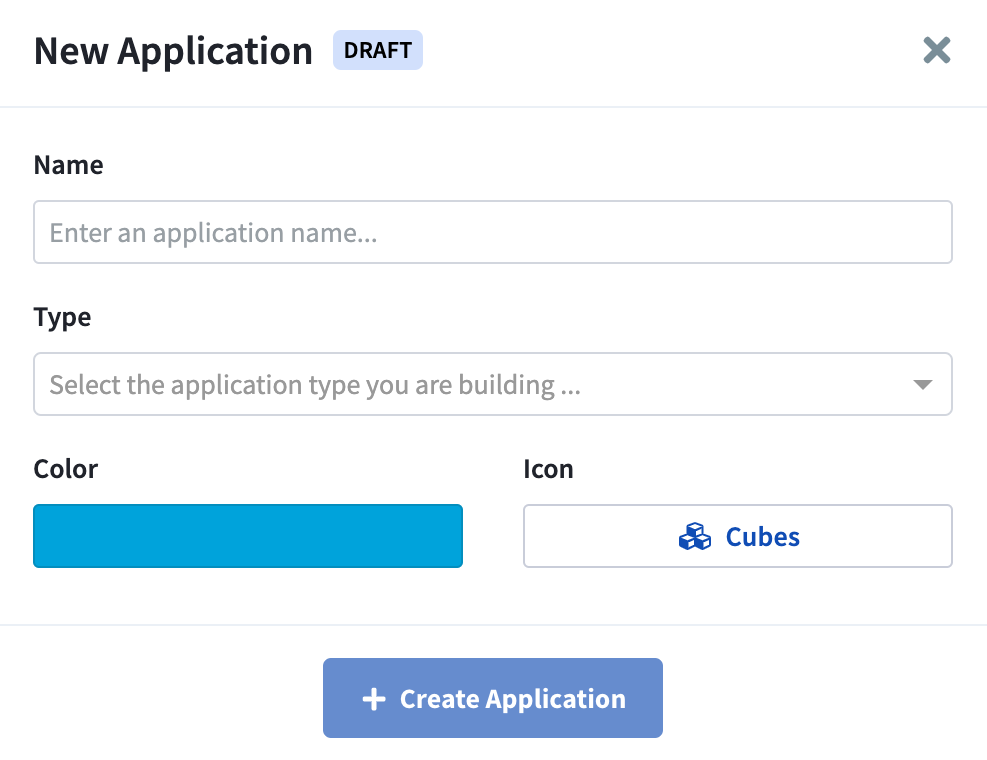
2. In the "New Application" modal window, enter the name of the Application. Optionally, you can select a type, color, and icon for the Application. Then, click + Create Application.

That's it! Your Application is now created. Clicking + Create Application will automatically bring you to Build > Applications where you can begin to build out your business process.
By default your newly created Application will be in the "Draft" status. See Managing Live and Draft Applications to learn more.
Next Steps
After creating an Application, the next step is to create a Workflow to house your Steps, Fields, and other routing logic. See How to create a new workflow to learn more.
Things to Remember
-
You can have any number of draft Applications within a given Risk Cloud instance. Live Application amounts are limited by your contract.
-
When building out the new Application, before anything shows up on your Home Screen for the new Workflows, you will first need to grant Permission Set access to the Steps you created.
